Encourage your child to be creative. Together, you can make a small animal from his handprint on the paper. In this lesson, you will learn how to make a handprint Easter bunny.

Easter bunny handprint
Total Time: 25 minutes
Step 1: Create a rabbit head from a handprint

First, trace the child’s hand with a pencil on a piece of blue paper. The child can try to do this himself or herself. Cut out the handprint with scissors to make a blank for the future bunny.
Step 2: Create a bunny hand

Fold your thumb over this blank. It will become one of the bunny’s paws.
Step 3: Create a second hand

The second paw will be the curved little finger.
Step 4: Get rid of the extra finger

Fold the middle finger on this paper handprint in the opposite direction to indicate the bunny ears.
Step 5: Take a marker
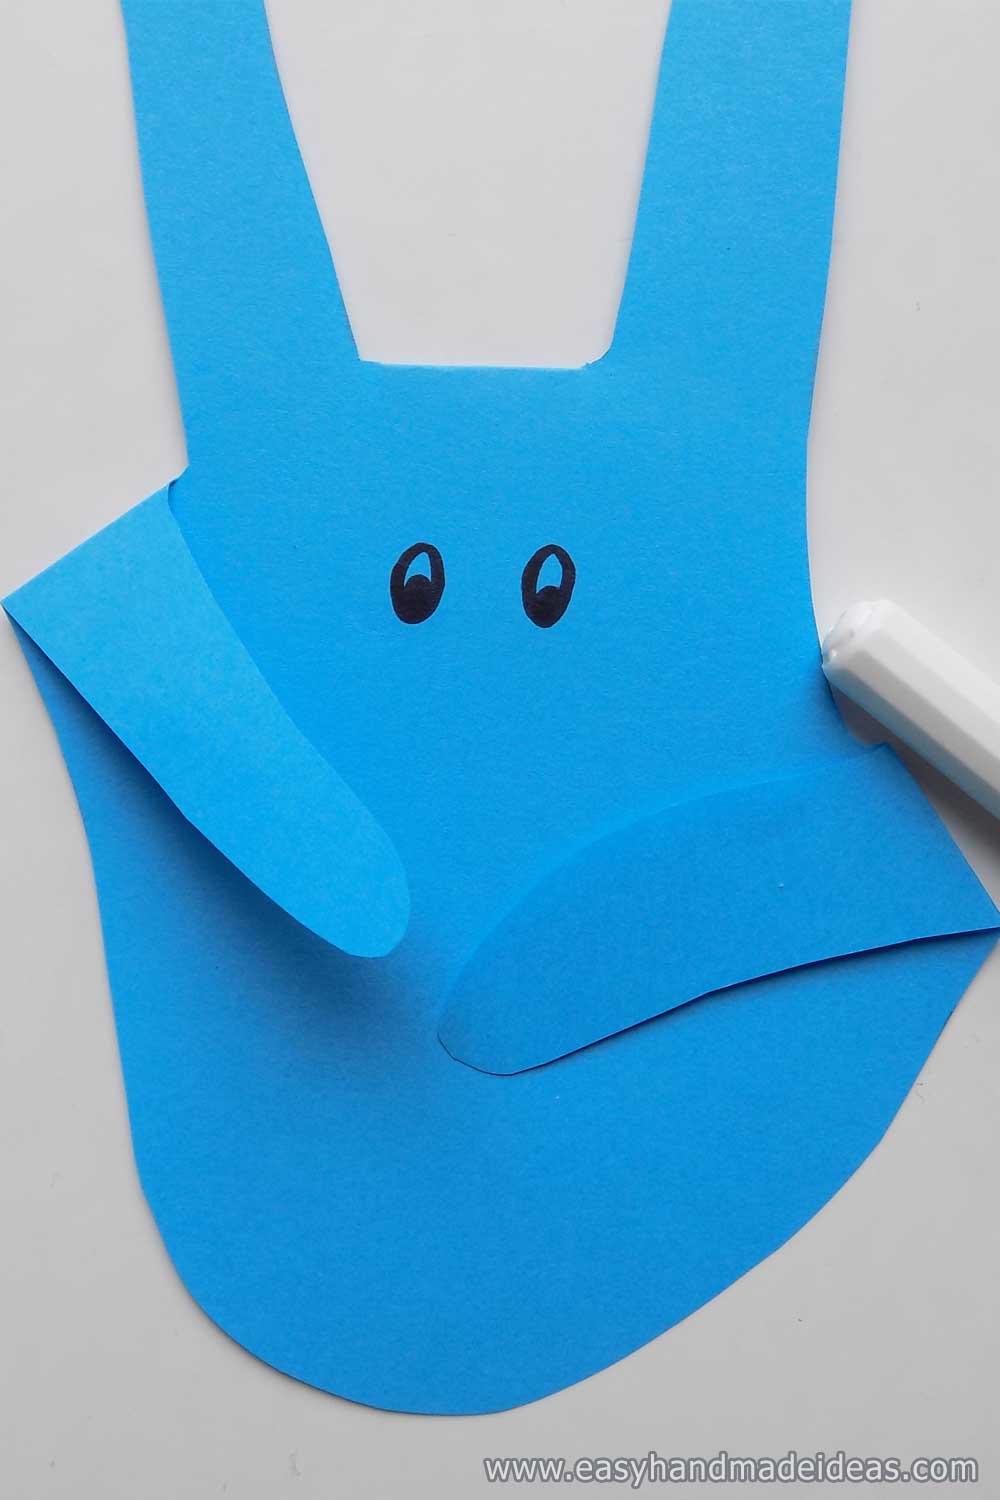
Pay attention to the design of your crafts. Draw eyes on the palm with a black marker.
Step 6: Use colored paper

Cut out the elements from pink paper and glue them on for the ears and nose.
Step 7: Make the bunny smile

Use a black marker to draw the rabbit’s mouth.
Step 8: Add a pair of teeth

Draw the teeth on a small piece of white paper with a black marker, then cut them out and glue them on. You will have a bunny like the one in the photo.
Supply:
- blue and pink paper;
- a small rectangle of white paper;
Tools:
- a simple pencil scissors;
- glue black marker.

Spend a fun time with your child creating such a funny Easter bunny. This craft is not only for a child, but also for a toddler.