There are several ways to make a paper tulip. In today’s lesson you will learn the easiest way to make a 3D paper tulip. This craft can even be done by small children.

Paper tulip
Total Time: 30 minutes
Step 1: Prepare a piece of red paper

Start making the flower. To make it, prepare a square of red paper.
Step 2: Transform paper

Mark the cross creases on the square.
Step 3: Transform the paper to other sides

Fold the blank along two diagonals.
Step 4: Use a scissors

Make 2.5-3 cm (0.98 – 1.18 in) cuts along the transverse folds.
Step 5: Use the glue
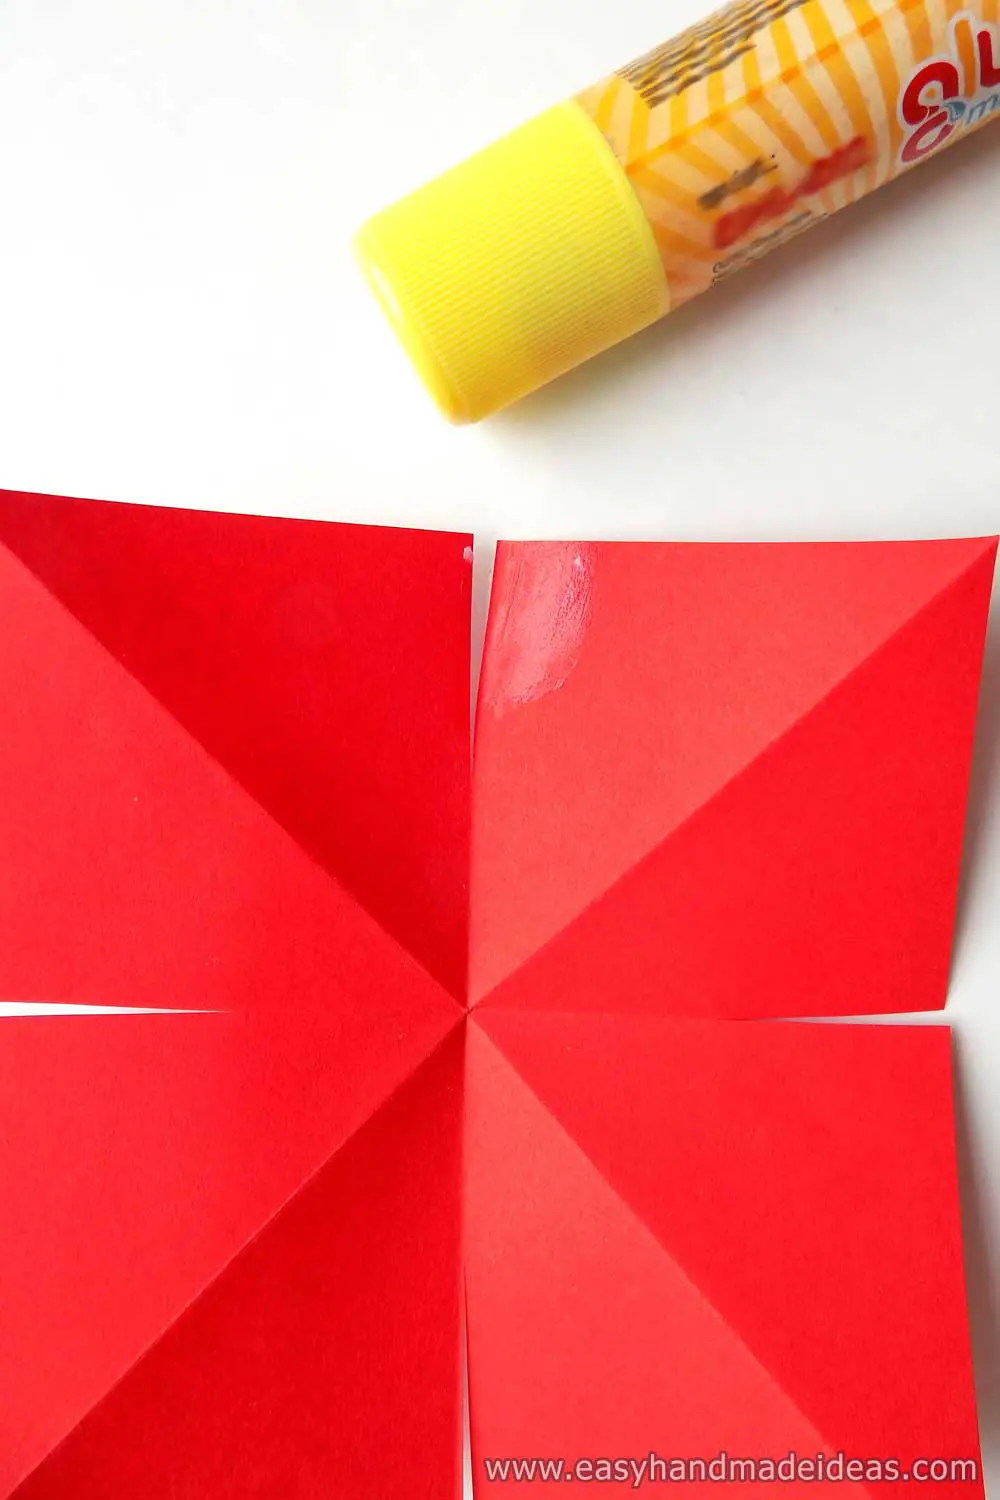
Apply glue to the area adjacent to the cut.
Step 6: Connect the cut pieces

Glue the cut edges of the square.
Step 7: Form a flower head

Glue all the cuts in the same way and you will get a flower.
Step 8: Work with the green paper

First, cut the sheet of paper in half, and then cut one half in half again.
Step 9: Use a large piece of green paper

From a large blank, make a stem for a tulip. Roll the sheet into a tube.
Step 10: Form the stem completely

Fix the edges with glue. Your stem is finished.
Step 11: Take the scissors

Make 4 incisions at the end of the stem and fold the edges.
Step 12: Connect the pieces of the flower

Apply glue and connect the stem to the red flower.
Step 13: Use small pieces of green paper

Fold the remaining 2 pieces of green paper in half and cut out the outline of the leaf.
Step 14: Prepare the glue

This will give you 2 leaves. Glue them to the bottom of the stem.
Supply:
- square of red paper with 11 cm (4.33 in) side;
- a sheet of green paper.
Tools:
- scissors;
- glue.

The paper Tulip is ready. You can make a bouquet of beautiful flowers or put them in a vase.
